Database-to-Website & API integration

An easy way to update your website in just one click.

viewing room

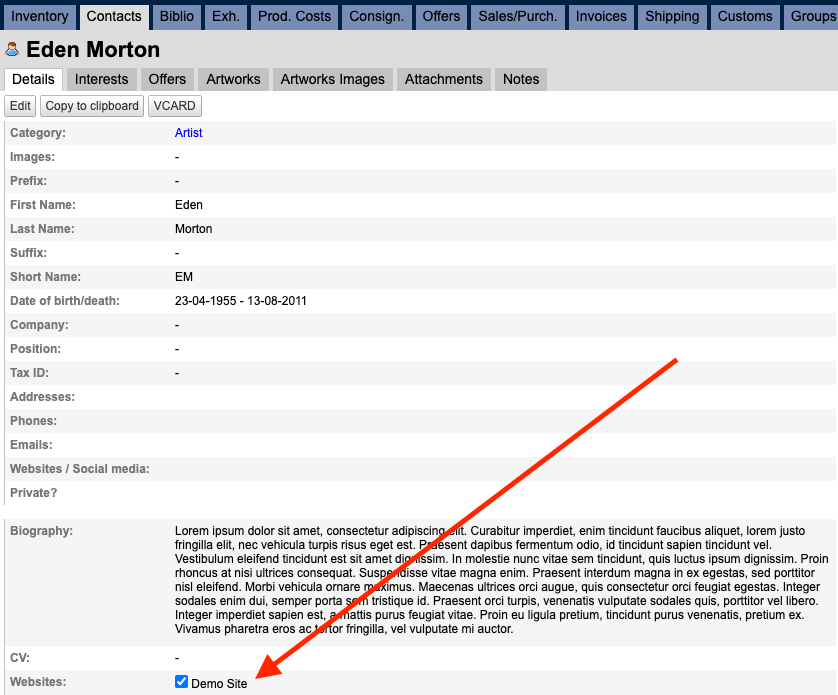
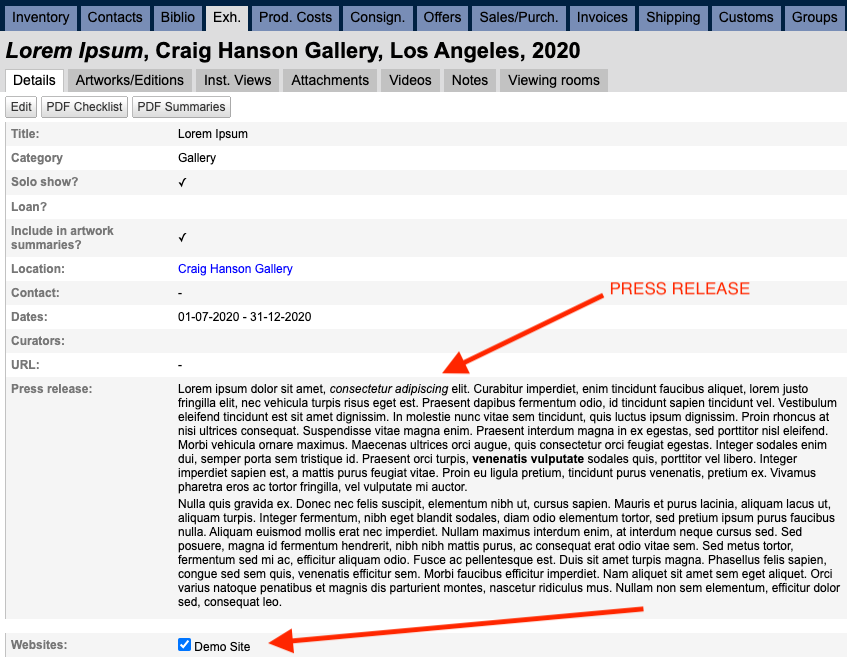
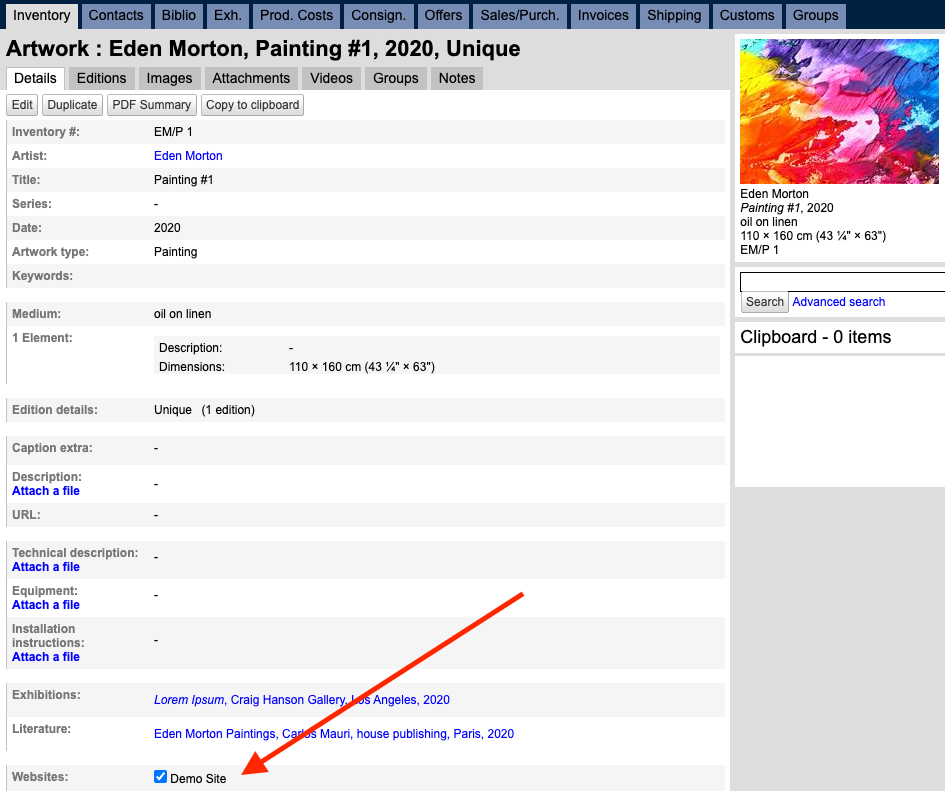
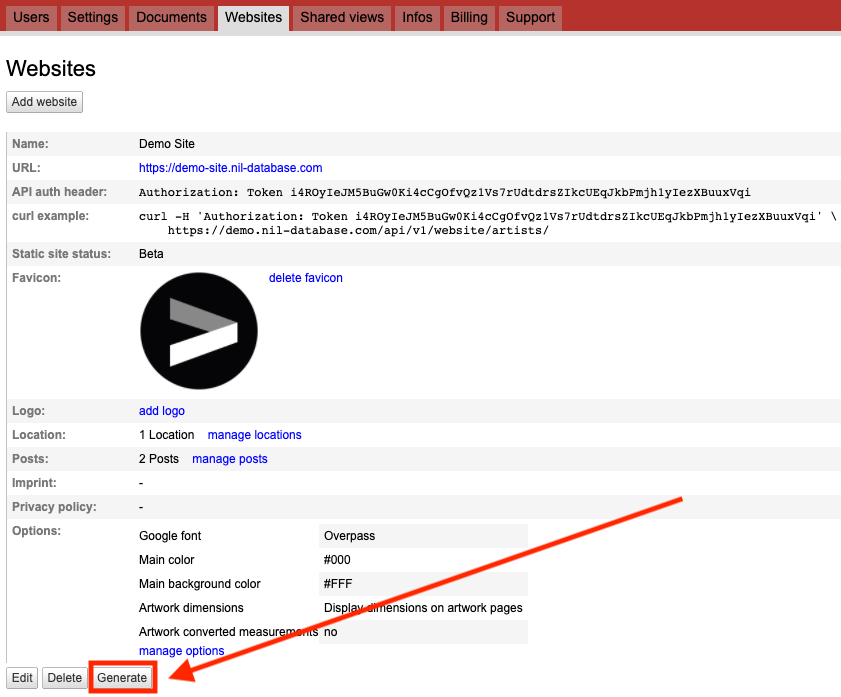
Display artists, artworks, exhibitions, viewing rooms and publications on your website by transferring them from nil database in just one click.

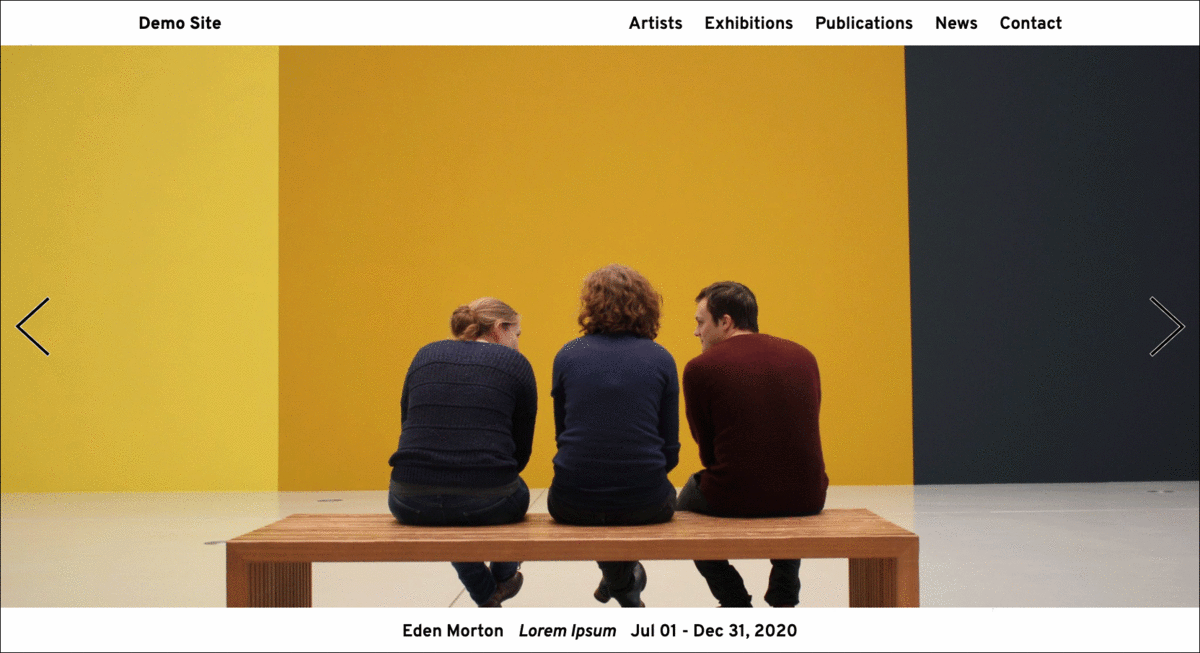
Our template has a simple and efficient look and works on all platforms.

No hosting provider is needed, only a domain name registration.

Click here to see our template.

Pricing: 500€/year (or 50€/month). No set-up fee*.

You already have a website? Get the API.

An API integration is the connection between two (or more) applications via their APIs, that lets those systems exchange data.
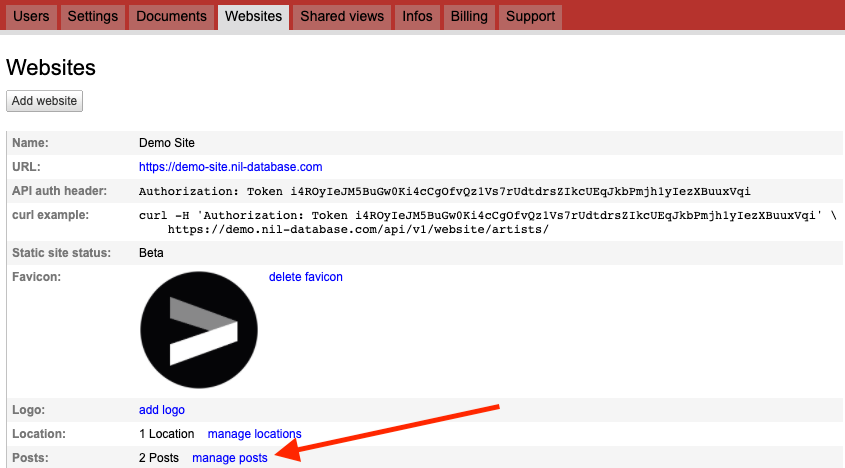
We provide your web developer with APIs which she/he integrates into your website (for artists, artworks/editions, exhibitions, publications and viewing rooms).
Once the API is set up by your developer, you select a record in nil database and press a button to sync it with your website.
The monthly fee is 20€.

You prefer a custom-made website?

We invite you to reach out to us to discuss your ideas and options.

User guide

Login to your nil database account.

Artists, Artworks, Exhibitions and Publications in nil database can sync automatically with your website.

login

Sync an Artist

Selected Contacts will be displayed on your Artists list (Menu → Artists). Biography and documents to download will appear under the Artist’s individual page.
In nil, go to Contacts and click on the first Artist you want to add to your website. At the bottom of the contact details tick the box Website. Repeat the steps below for each artist.

To add a biography, edit the record and enter the text under biography. Format the text with Markdown (add italic, bold, links...).

add an artist

Add a downloadable file

To add PDFs that your visitors can save from your website on the artist's page to their device, you will need to upload the files under the contact’s Attachments tab. You must select a role for each PDF: Biography, Bibliography, CV or Selected texts before uploading it.

add downloadable files

Set-up categories for your exhibitions

Set-up your exhibitions categories: Go to Account Administration → Settings and scroll down to Exhibition categories. The categories are important because they are included in the filters on the Exhibitions page.
The default categories are: Art Fairs, Auctions, External (outside the gallery), Gallery (your gallery program), Online & Projects. Feel free to edit the categories.

exhibition categories

Sync an exhibition

Selected exhibitions will be displayed on the Exhibition page (Menu → Exhibitions) under Current, Upcoming and Past so it’s mandatory to add dates for each exhibition. Current and upcoming exhibitions will also be displayed on the Homepage.

In nil, go to Exhibitions and click on the first Exhibition you want to add to your website. At the bottom of the exhibition details tick the box Website. Repeat the steps below for each exhibition.

To add a press release, edit the record and enter the text under press release. Format the text with Markdown (add italic, bold, links...).

The first image under the Installation views tab will be displayed on the Homepage for current and upcoming exhibitions. Minimum resolution required is 2048px wide but 4000px is best for retina.

add an exhibition

Sync an artwork

Selected artworks will be displayed on the Artist’s page (Menu → Artists → Artist’s page).
In nil, go to Inventory and click on the first artwork you want to add to your website. At the bottom of the artwork details tick the box Website. Repeat the steps below for each artwork.

add an artwork

Sync a publication

Selected publications will be displayed on the Publications page (Menu → Publications) and on the Artist’s page (Menu → Artists → Artist’s page).
In nil, go to Biblio and click on the first publication you want to add to your website. At the bottom of the publication details tick the box Website. Repeat the steps below for each publication.

To add a Paypal ID, edit the record and enter the ID under Paypal hosted button ID.

To add a description, edit the record and enter it under description.

To add a cover image, click on the Scans tab and click on Add an image.

add a publication

Create News

Posts are displayed on the News page (Menu → News) and on the homepage if current.
Go to Account administration and locate the Websites tab. Click on Manage posts. Add as many posts as you want. Select if you want it to be featured on the homepage or not, enter the publish start and end dates, give it a title, write a blurb and some contents.

To add an image, save your post and click on the Images tab to upload it.

create news

Create Contact page

Your contact details and location are displayed on the Contact page (Menu → Contact).
Go to Account administration and locate the Websites tab. Click on Manage Locations. Under Contact, select your contact record that you priorly have updated with an image, full address, email, telephone number, and social media.
Enter directions, opening hours and add the url for visitors to subscribe to your mailing list.

To add an image, edit your contact record and upload an image.

create contact page

Publish

Once you are done, you need to publish your content.

Go to Account administration and locate the Websites tab. Click on the Generate button to sync your content and do not close the window until the sync is finished.

publish

*Included in the free set-up:
Your font, your logo, text/background color, and assistance to link the website to your domain. Any further customization will be billed with a starting fee of 200€ and extra charges might apply depending on the level of customization required.