nil > groups iOS App
Our App allows you to present & share artworks during art fairs.
Curate a selection, generate a viewing room link, and send it via WhatsApp, SMS or email. Available on BASIC and PRO plans.
Curate a selection, generate a viewing room link, and send it via WhatsApp, SMS or email. Available on BASIC and PRO plans.
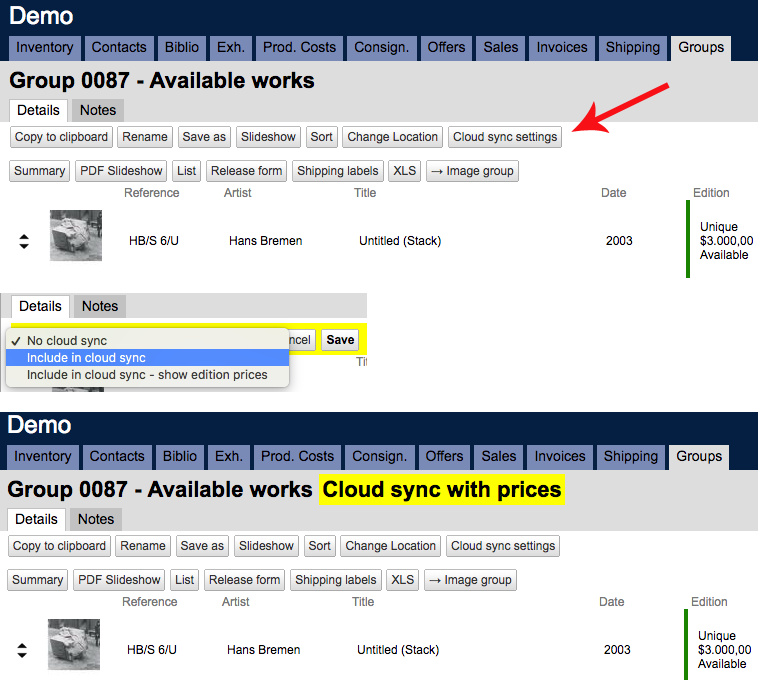
In your nil > database account, open a group and click Cloud sync settings. Choose whether to show edition prices or not, then save.
A yellow Cloud Sync or Cloud Sync with prices tag will appear next to the group title. To remove a group from sync, click Cloud sync settings again and select No Cloud Sync.
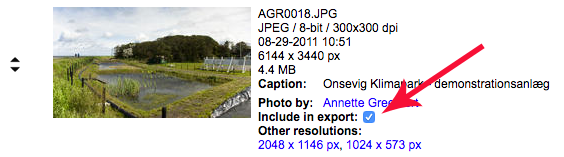
In the Images tab of each artwork, tick or untick Include in export to control which images are downloaded to the app.
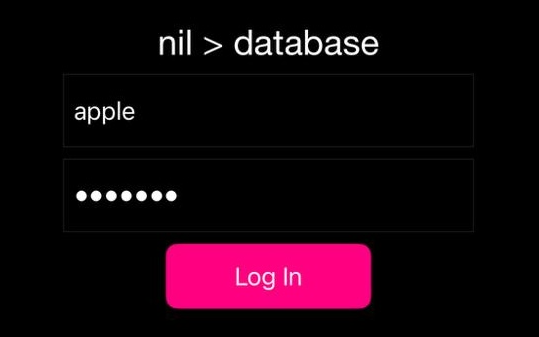
On first launch, a login screen appears. Enter your username and password as you would on the online database.
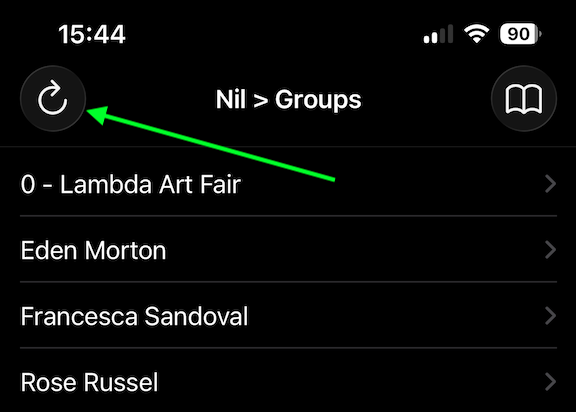
A network activity indicator appears while the app is syncing. After any changes in your database, tap the refresh button to trigger a new sync.
Large libraries: on your device, turn off Auto-Lock (Settings > General > Auto-Lock > Never) and keep your device plugged in during the process.
Issues with syncing: press and hold the refresh button for two seconds — a Full sync prompt will appear. Tap OK and do not quit the app until the progress bar completes.
Go to your device's Settings > Apps and scroll to Nil Groups. From here you can:
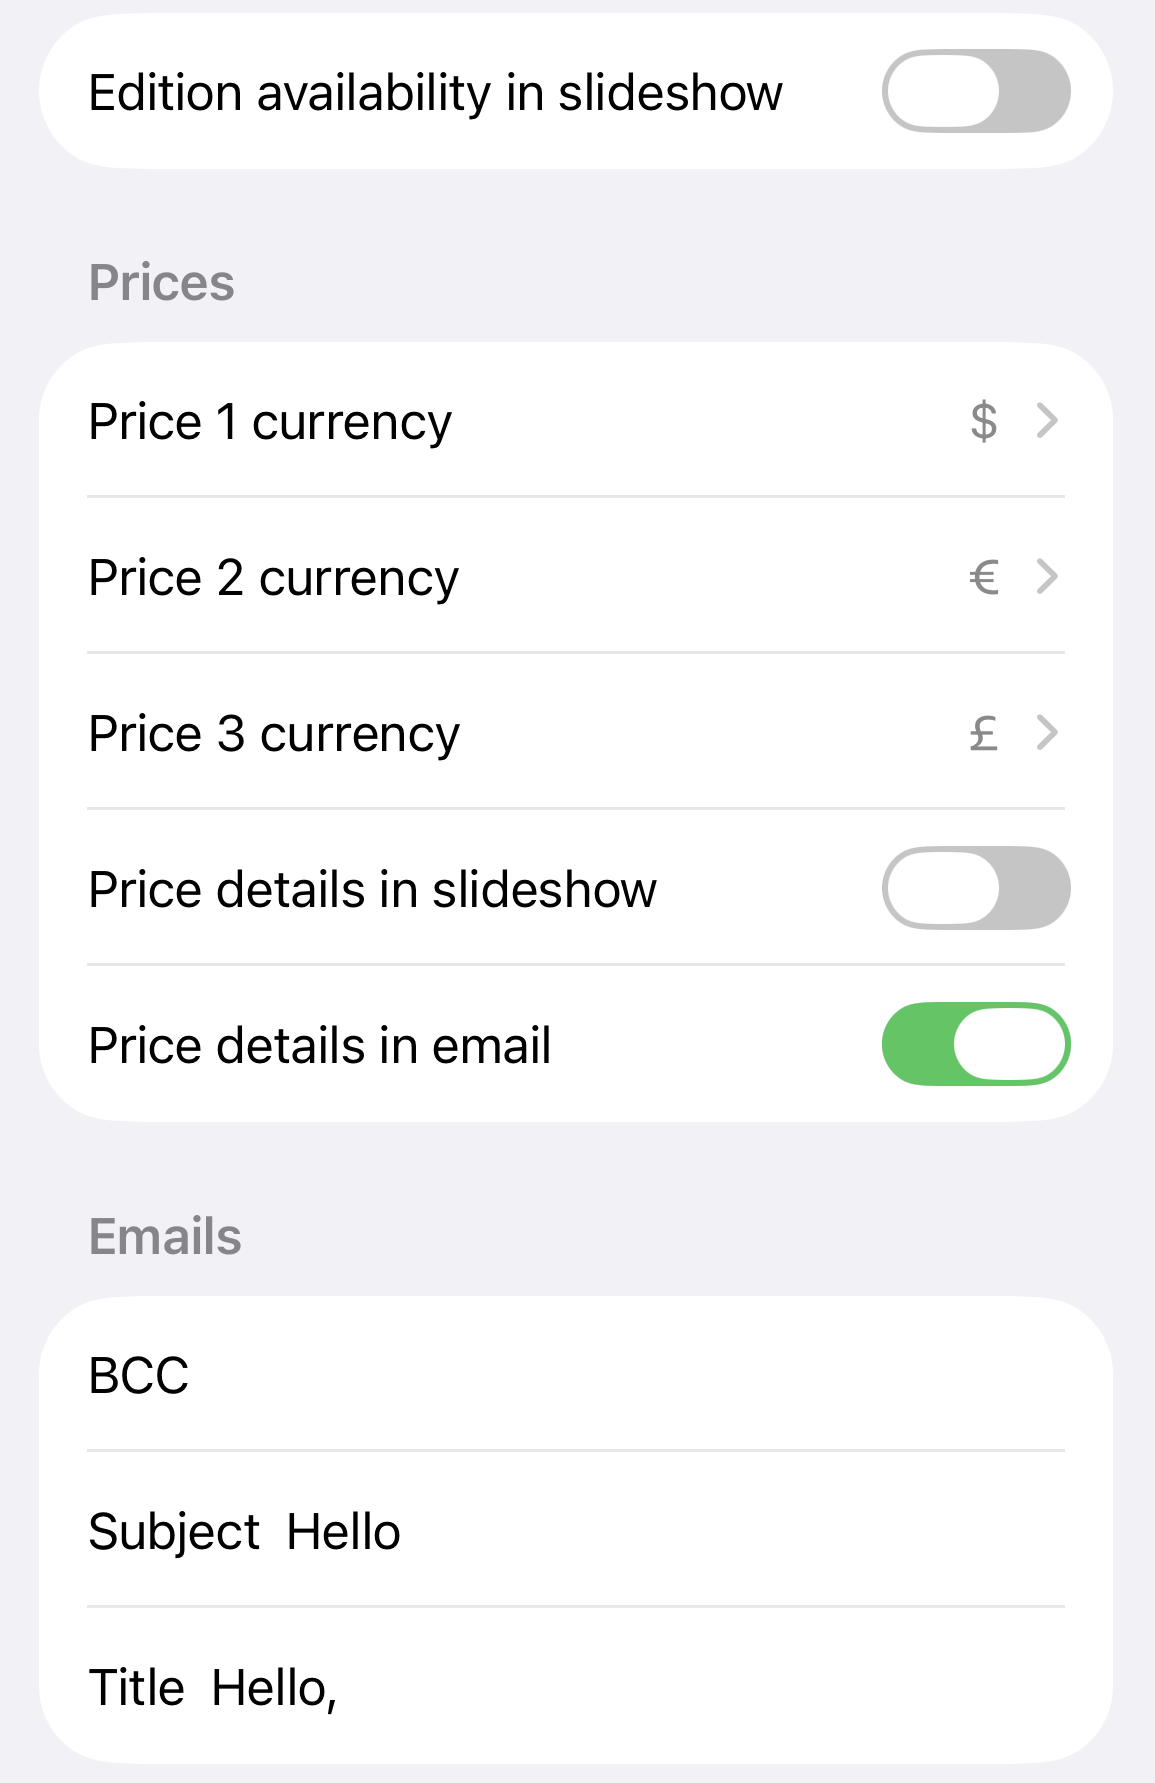
1. Toggle availability display.
2. Select up to three currencies (mandatory to display prices).
3. Show or hide price details in slideshow and email.
4. Set a default BCC address, subject line, and email title.
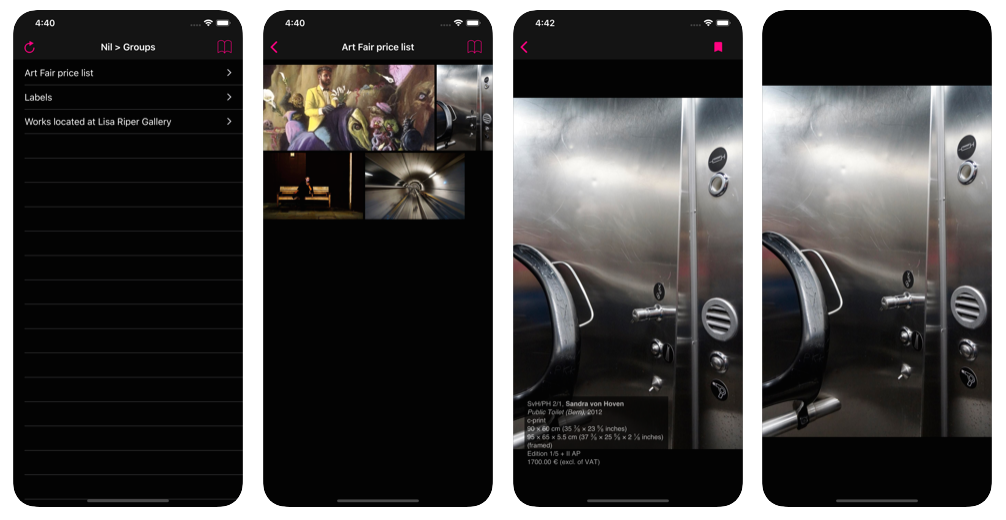
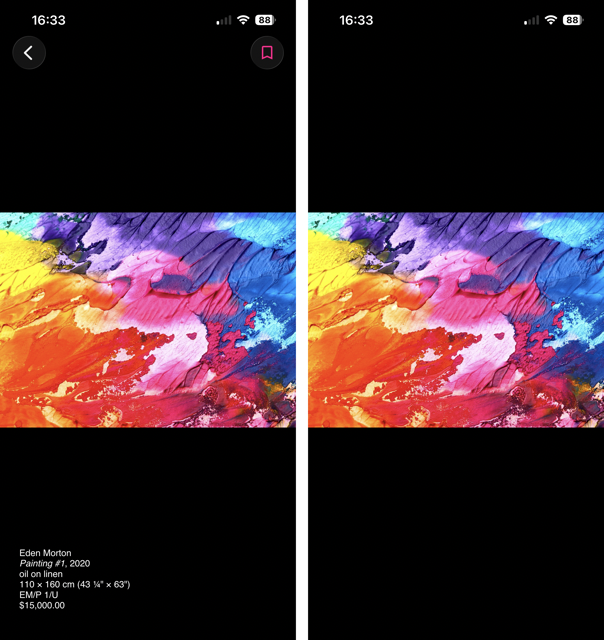
Tap the screen to toggle captions on and off. Swipe left or right to move between images. Tap the arrow to go back to the list.
Tap any image to view it full screen, then swipe down to dismiss and return to the list.
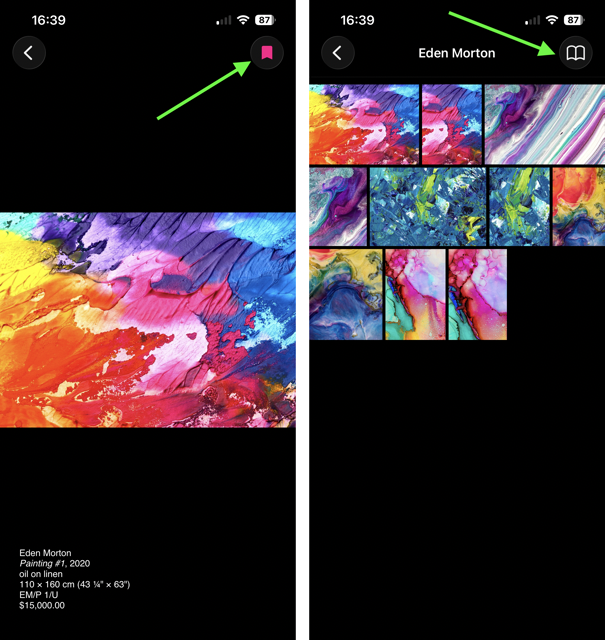
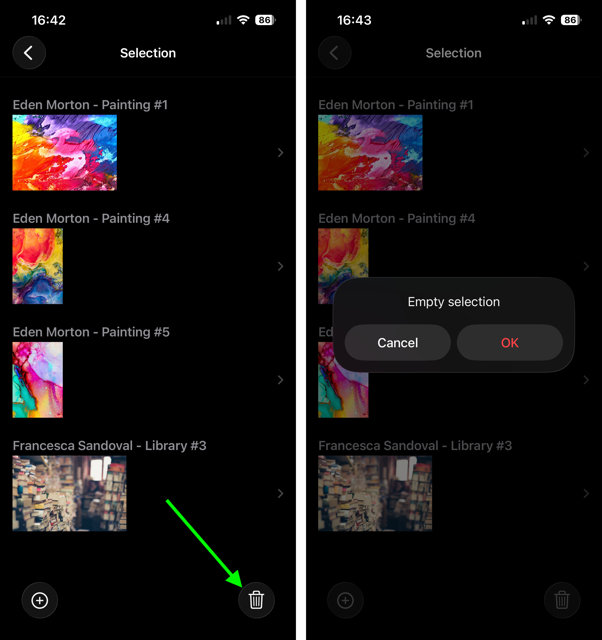
Tap the pink bookmark icon (top right) on any image to add it to your selection — the icon fills when selected. Select as many images as you need. Tap the back arrow, then the bookmark icon to view your full selection.
From the selection view, tap the bin icon and confirm with OK to clear all selected works.
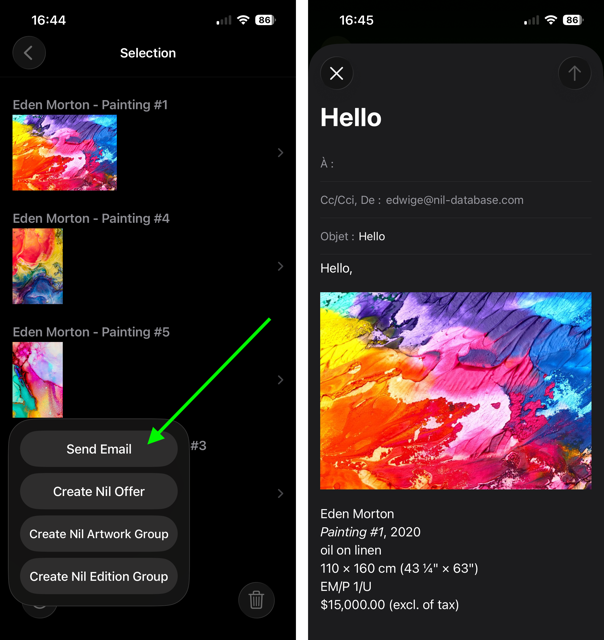
From the selection view, tap + then Send Email. The Mail app opens with your default BCC, subject, and title pre-filled. Edit as needed and tap Send.
Images not showing in Mail?
On your device, go to Settings > Mail and make sure Load Remote Images is toggled on.
Instead of a traditional email, you can now generate a viewing room shareable via WhatsApp, SMS, or email in one tap.
1. Open the share menu.
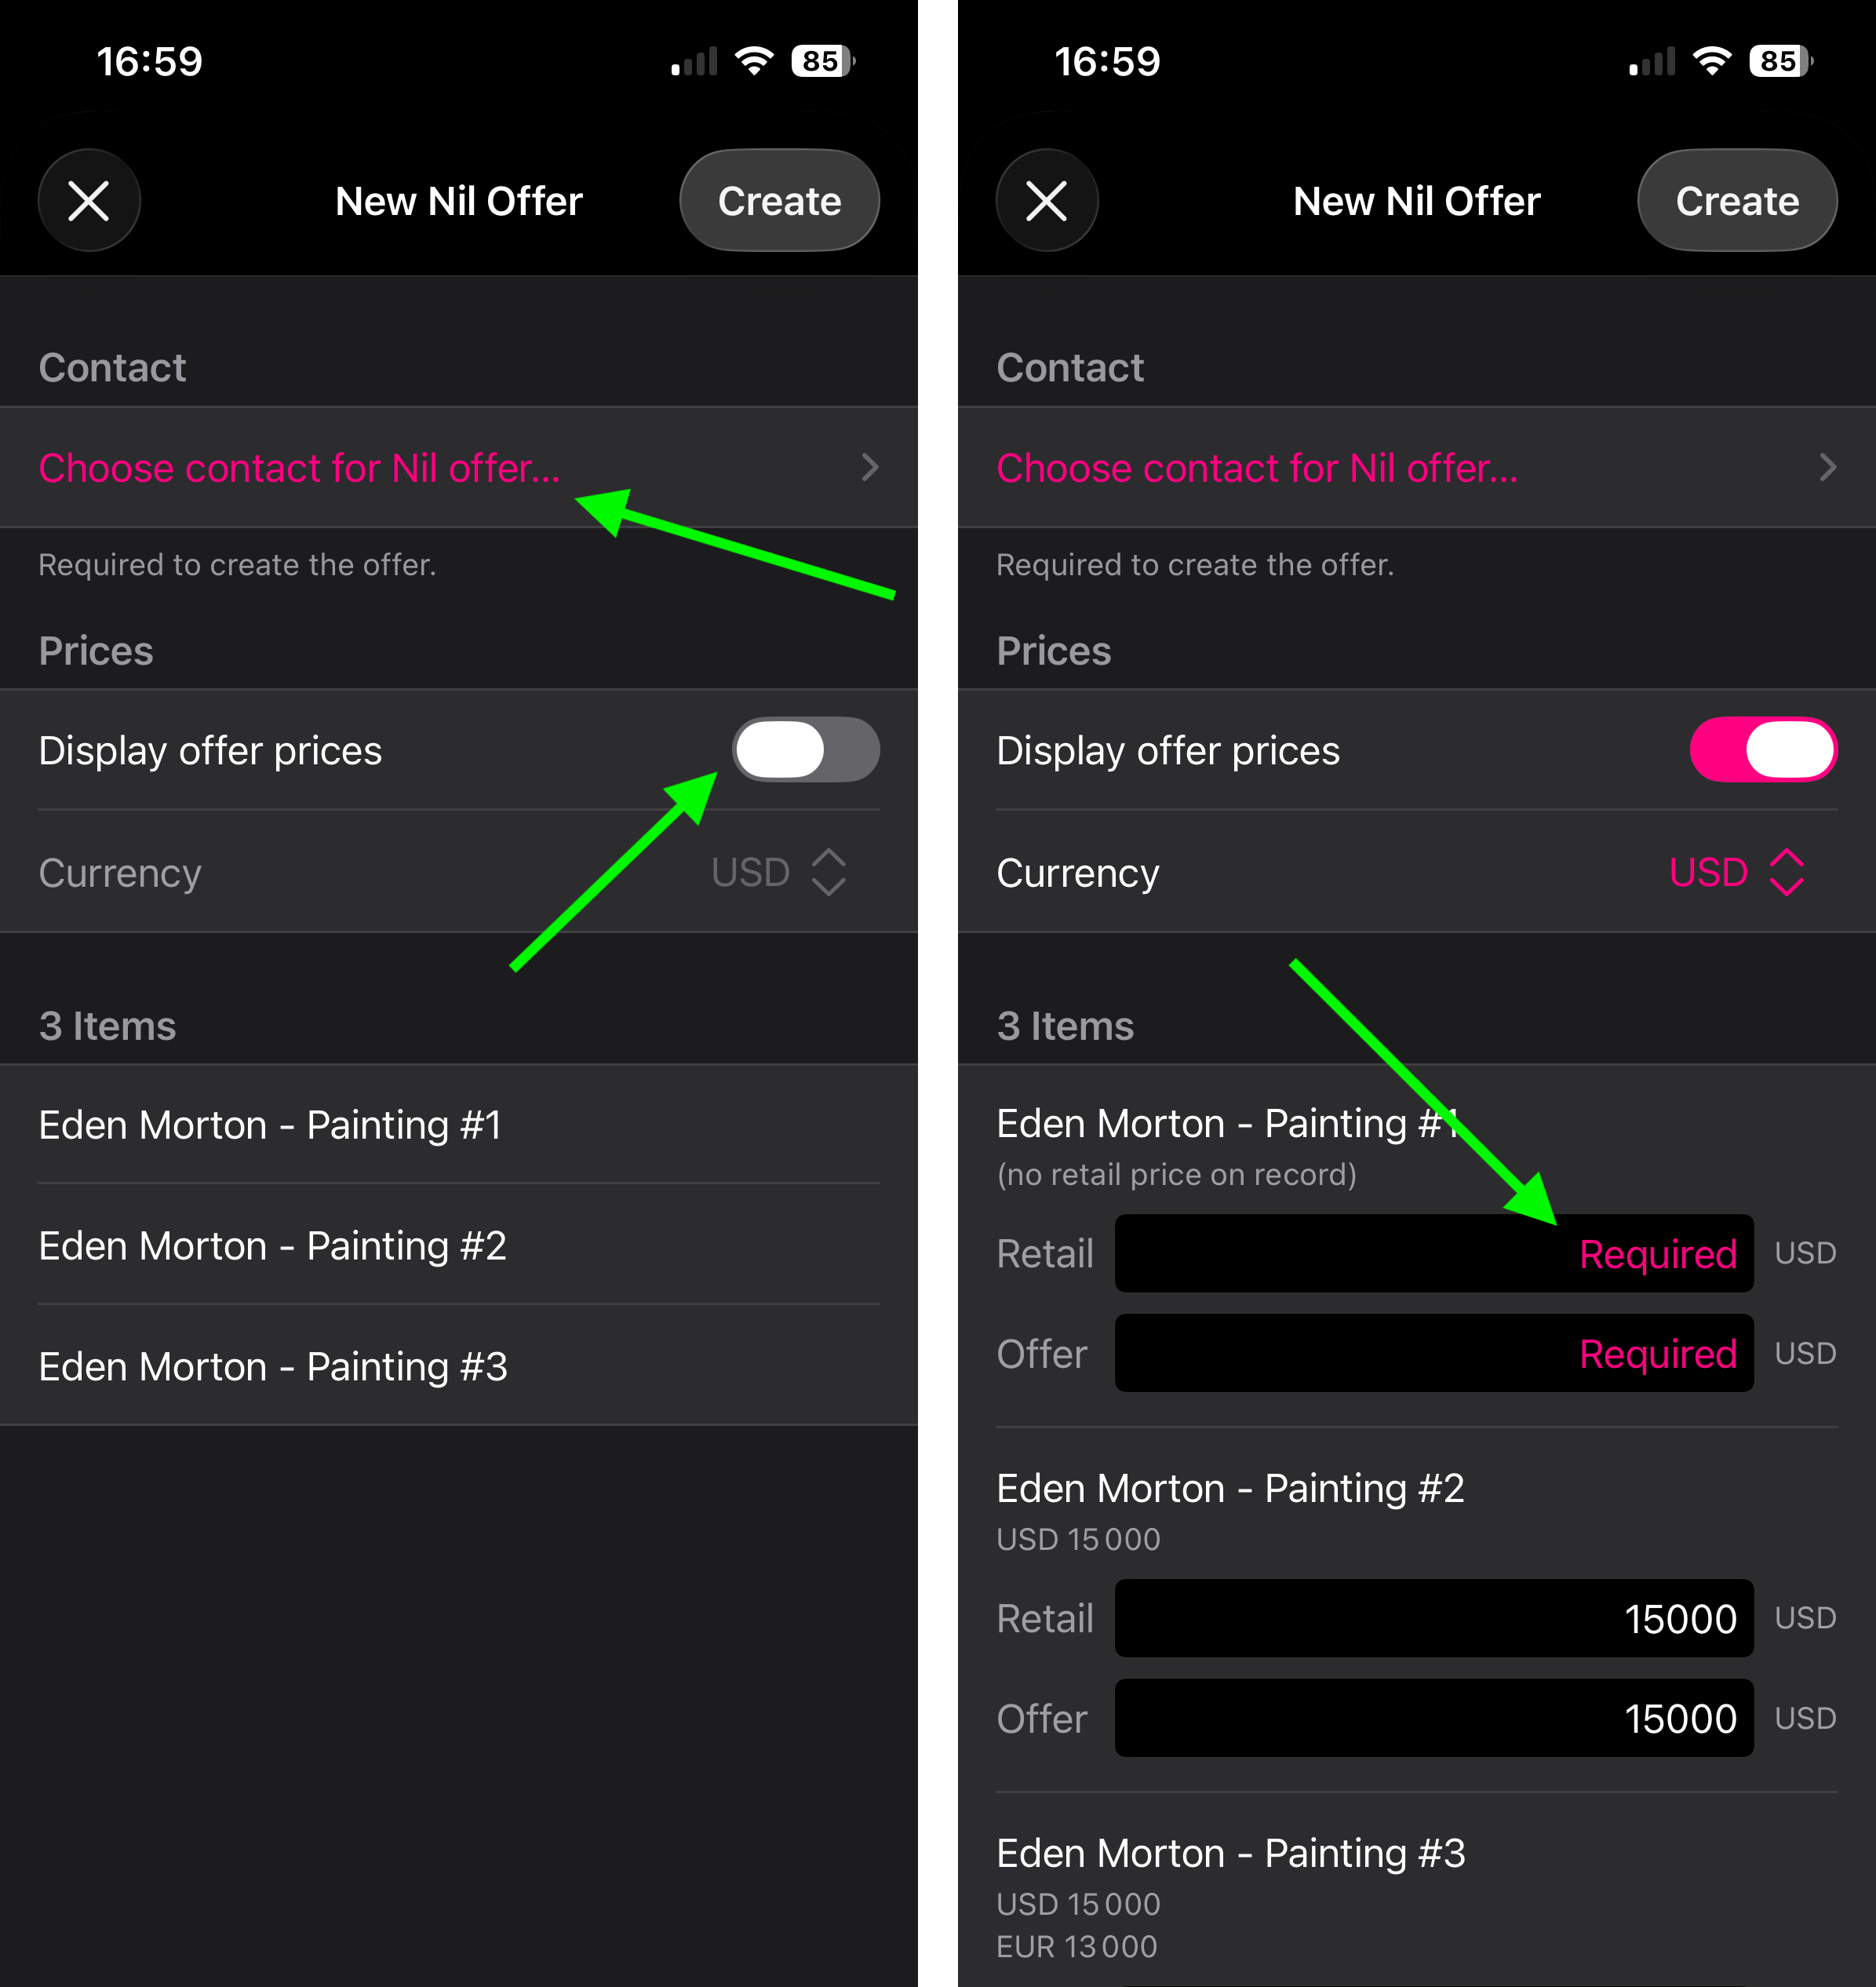
From your selection, tap + and Create Nil Offer. This automatically creates an Offer associated with your new viewing room.
2. Configure offer.
Select a contact (required to link the record in nil database). Toggle Display offer prices and choose a currency.
Both Retail and Offer prices are required during setup — but only the Offer price is displayed in the viewing room. Tap Create.
3. Share the link.
Once created, tap Share viewing room to send via WhatsApp, SMS, or email.
The recipient doesn't need to be the same contact linked to the offer.
The viewing room link can be shared with anyone — your contact list is used only to link the record in your nil database.
1. Open the share menu.
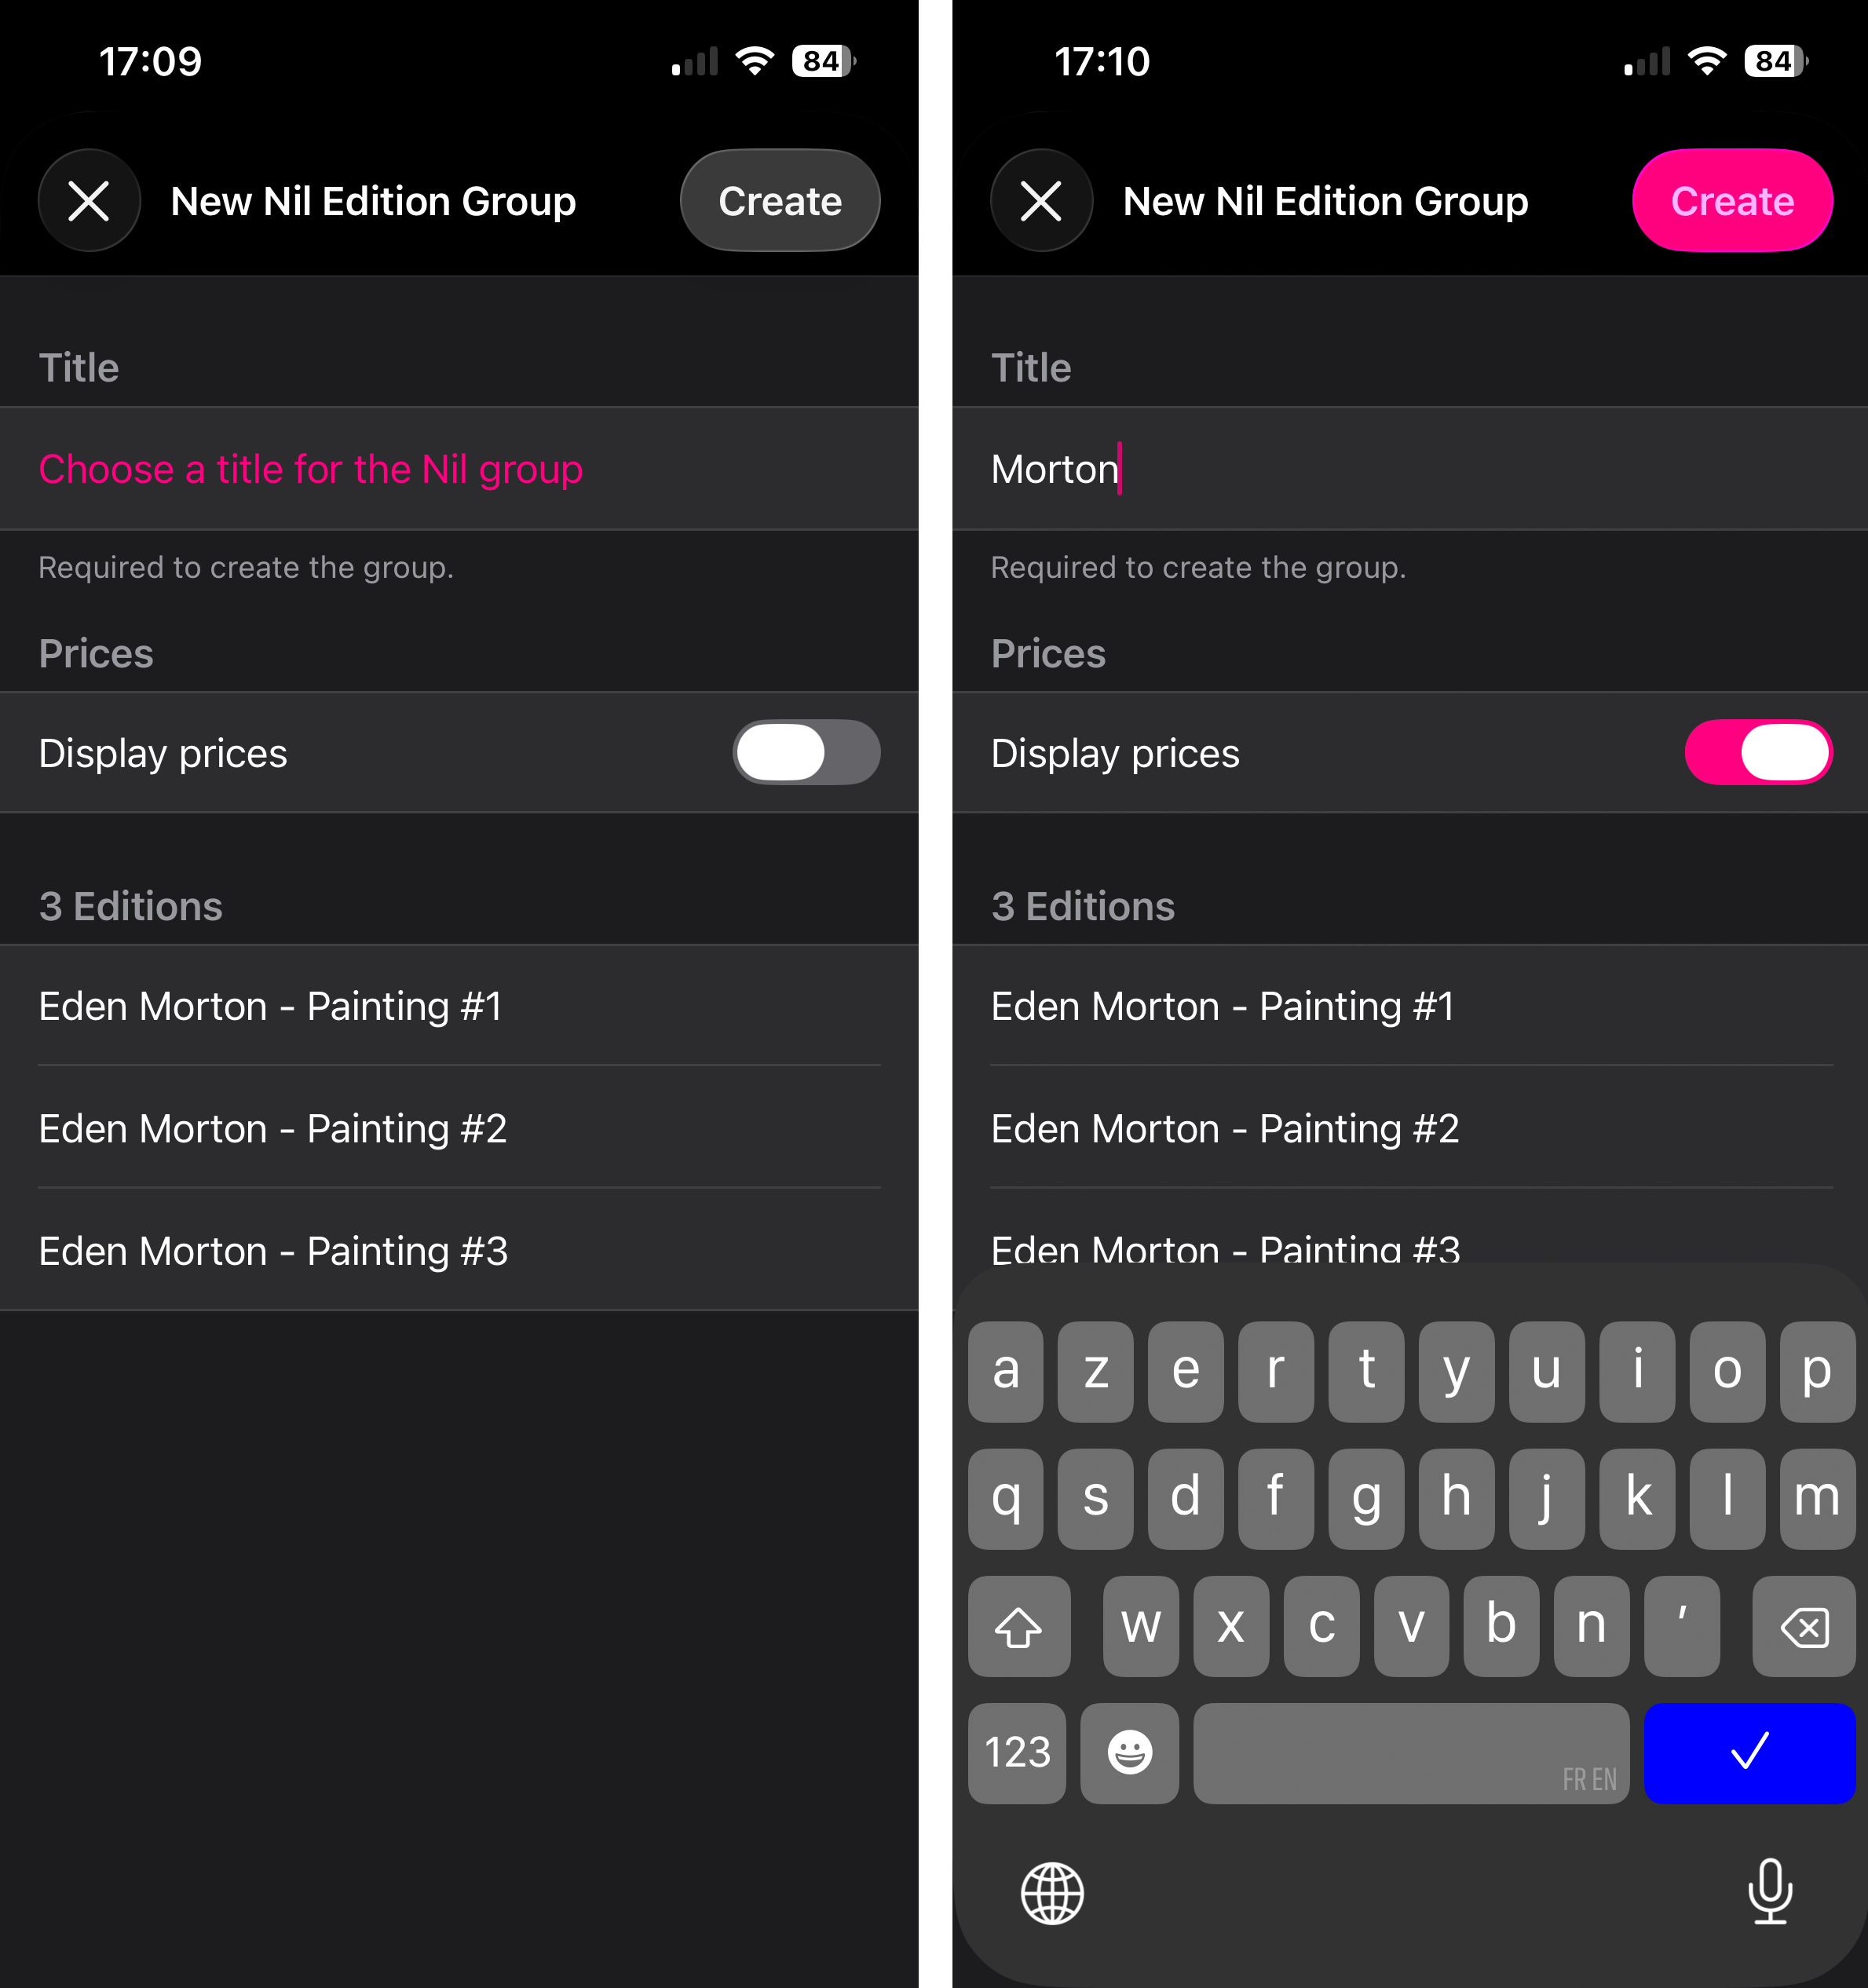
From your selection, tap +. Choose Create Nil Artwork Group or Nil Edition Group depending on your context.
This automatically creates a Group associated with your new viewing room.
2. Configure.
Enter a title — this is required to create the group. Tap Create.
Artwork Groups: prices are not available.
Edition Groups: default prices are shown but cannot be modified (unlike with an Offer).
3. Share the link.
Once created, tap Share viewing room to send via WhatsApp, SMS, or email.
You need to select in nil which groups you want to sync. Open the group in your database and click Cloud sync settings.
Tap the refresh button. If that doesn't work, press and hold the refresh button for two seconds — a Full sync prompt will appear.
Tap OK and do not quit the app until the progress bar completes.
Tap the refresh button, or quit and relaunch the app. If it persists, trigger a full sync (press and hold the refresh button for two seconds).
Go to Settings > Mail and make sure Load Remote Images is toggled on.
The app requires Apple Mail to be configured. Go to Settings > Mail > Accounts and add an account. Make sure the Mail icon is green under that account.
Go to the Images tab for that artwork in nil database and untick Include in export.